
An email course is a series of emails that teaches your audience about a specific topic or activity. These courses are most often used as signup bonuses, encouraging visitors to your site to sign up for your mailing list. In this guide, I’ll show you how to create an email course that encourages both subscribers and sales.
To do this, I’ll explore:
- The benefits of an email course
- How to plan an email course
- How to create an email course
- How to promote an email course
By the time you’re finished reading, you’ll have a general understanding of how to build your first email course.
The benefits of an email course
Building an email course for your audience has four main benefits:
Encourage signups
An email course can serve as a high-value opt-in bonus, encouraging casual visitors to become subscribers. In fact, most businesses that offer email courses use them primarily as a way to encourage signups. This includes MailPoet: when you sign up for our newsletter, you’ll get access to a 4 part course on email marketing.
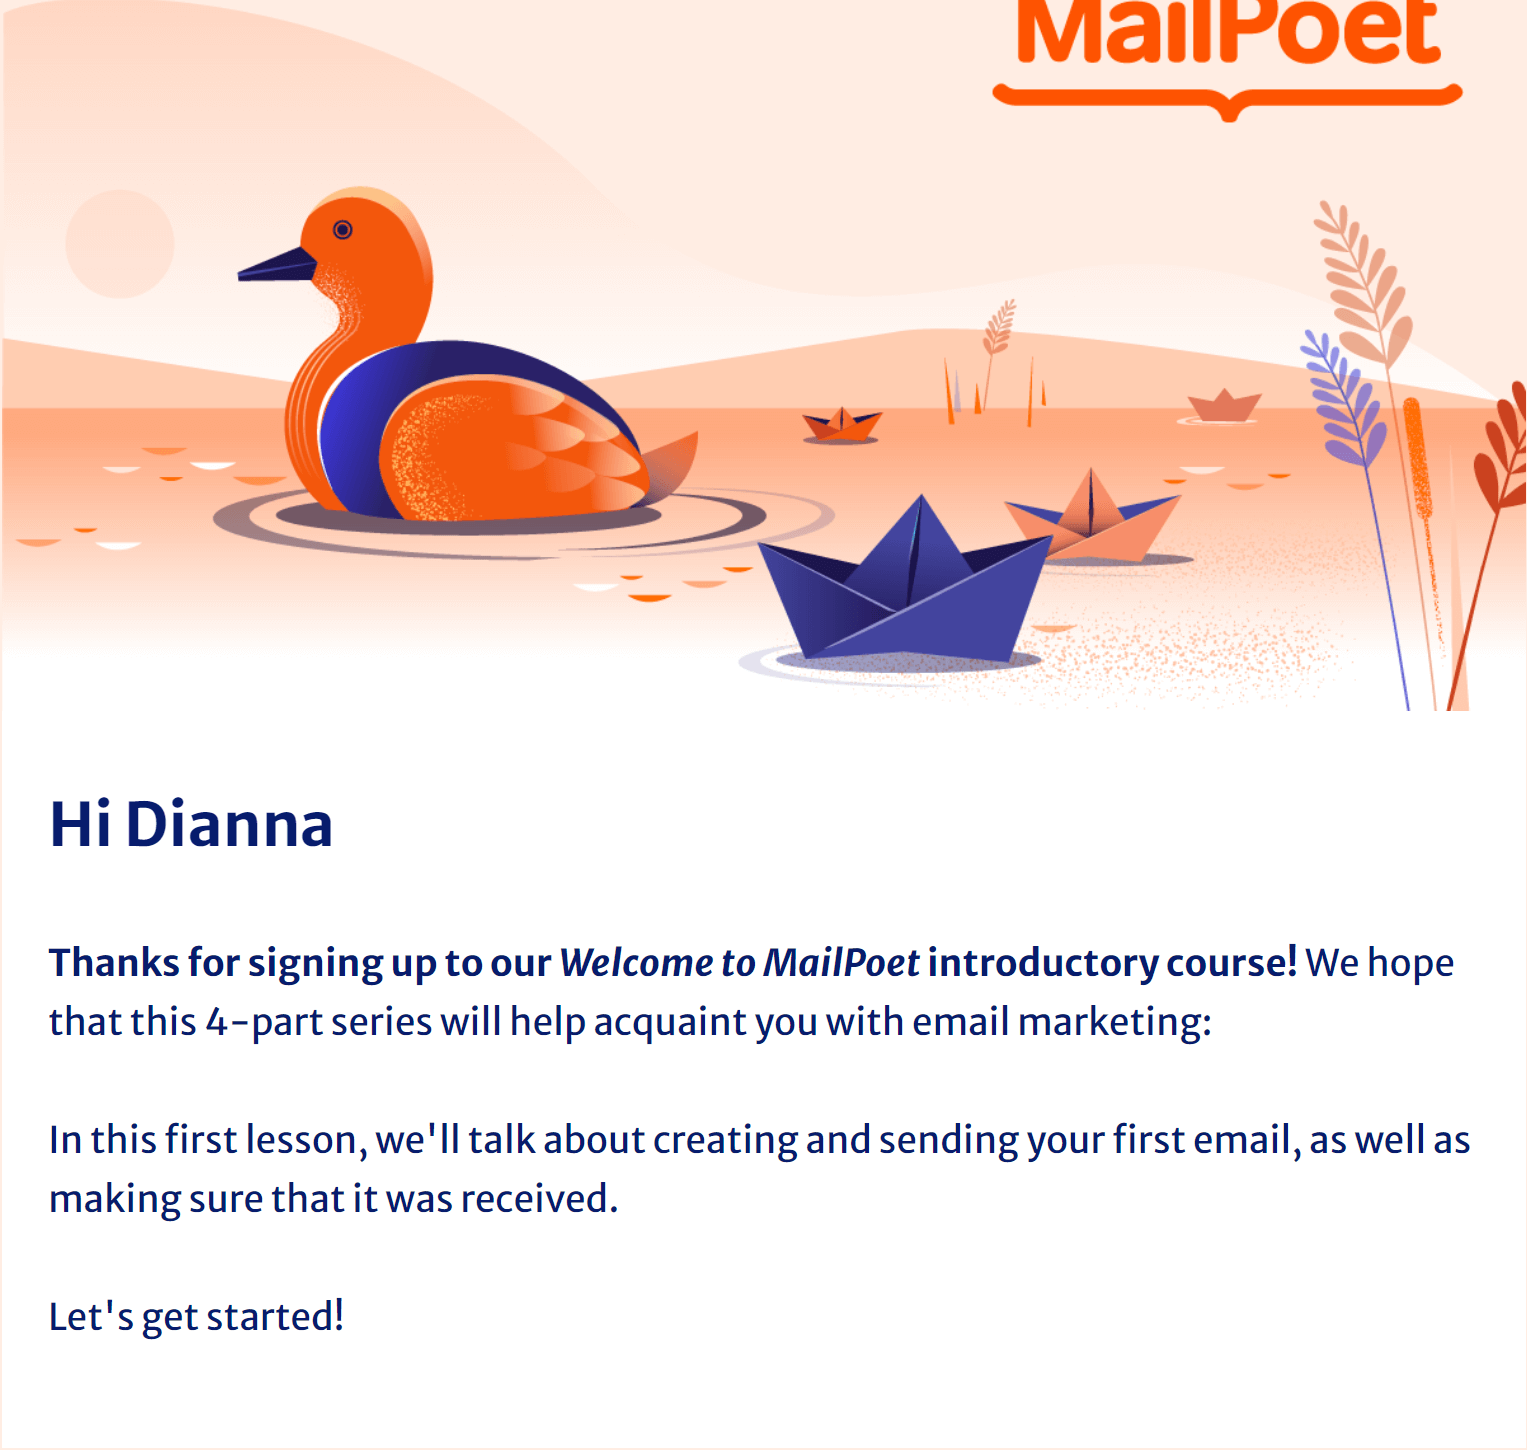
A large percentage of our audience is new to email marketing, so this course is an effective signup incentive.
Establish your expertise
Creating an email course positions your brand as an expert in your industry. Like a book, an email course demonstrates to casual visitors that you’ve spent a lot of time thinking about what you do and how it can help people. Its sheer existence might be enough to convince someone to work with you without even taking the course.
Showcase your teaching style
If you sell video courses or coaching programs, an email course is a great way to give potential customers an idea of how you teach. This can help them decide whether or not they’ll invest in one of your paid programs.
Teach people how to use your products or services
Another great way to use email courses is to teach people how to use your products and services. Or, in the case of an email course from Patch, how to keep their products alive:
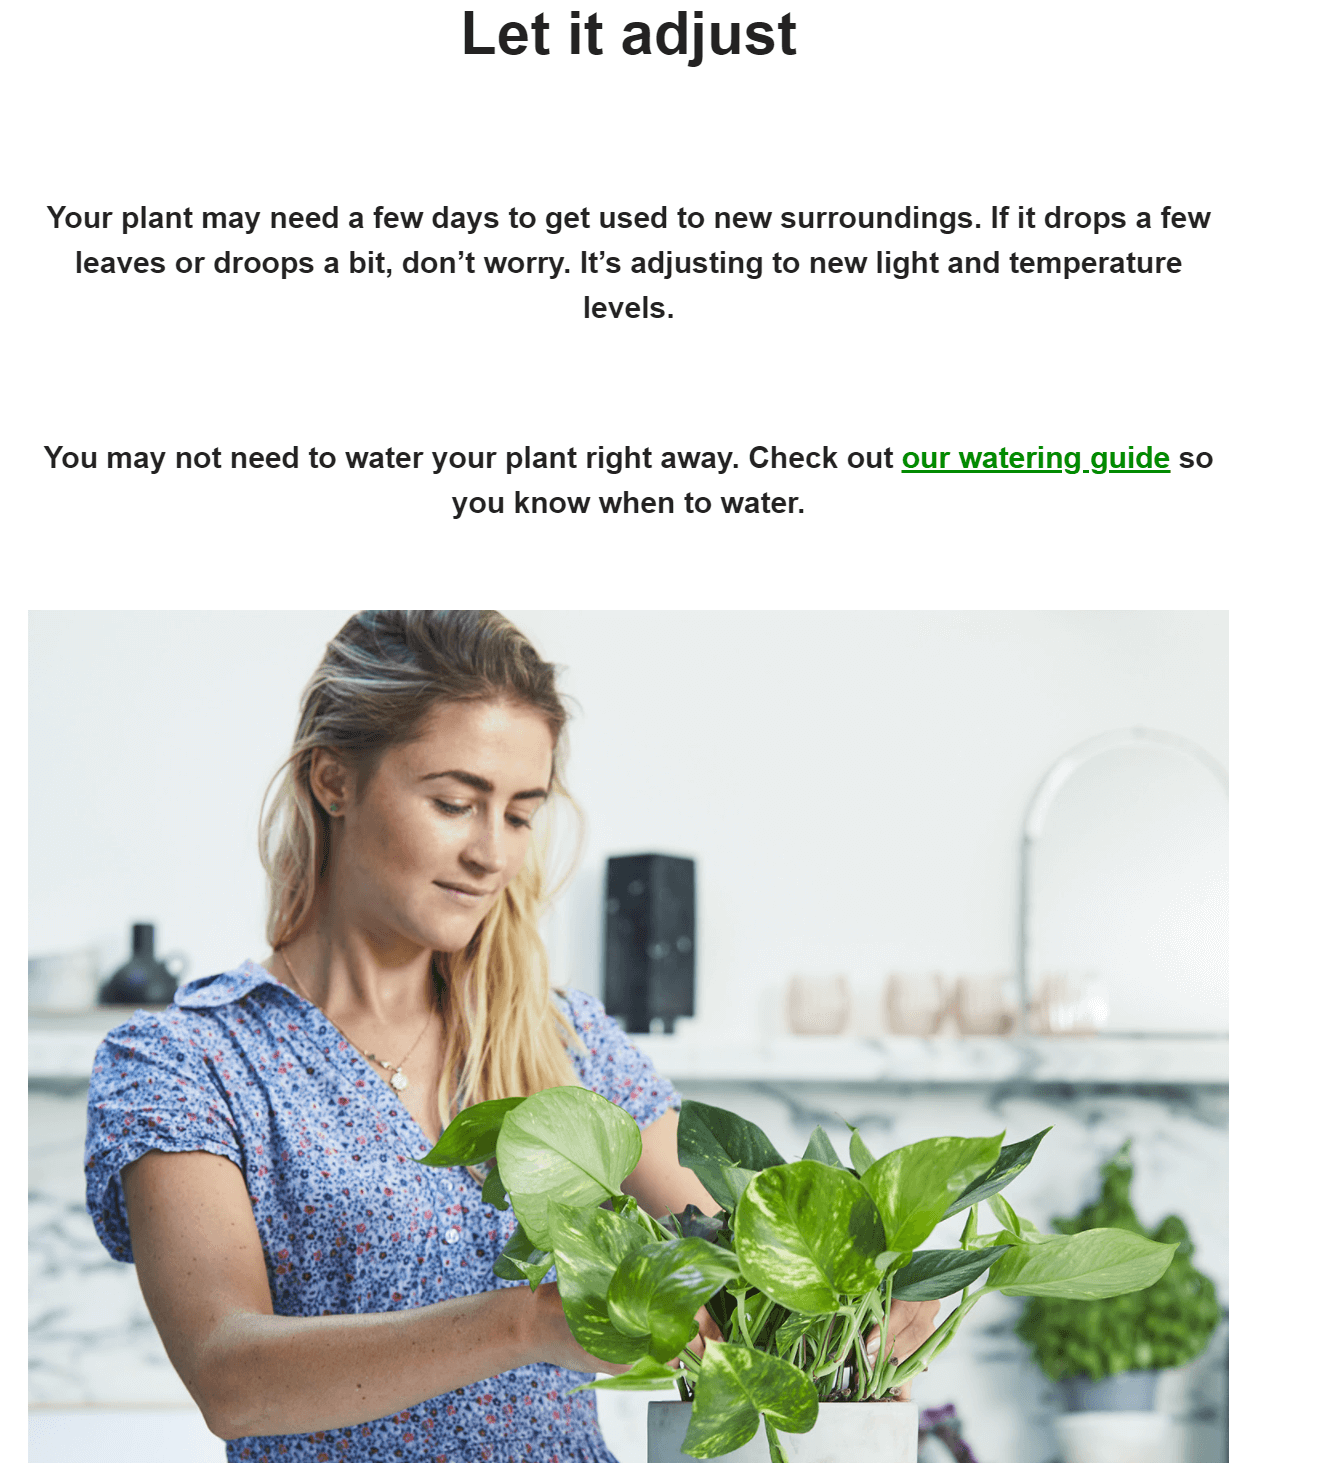
This is a great way to establish the quality of your work and enhance your customers’ overall experience of your brand.
How to plan an email course
1. Choose internal goal(s) for the email course
An internal goal is what you hope your email course will achieve for your business. These goals typically fall into one of three categories:
- Subscriber growth. This is a specific number of new subscribers or an increase in the percentage of new subscribers you receive within a set period of time.
- Relationship establishment. This includes goals like encouraging an increase in reviews and getting people to provide suggestions for your business or newsletter.
- Sales. You might have different sales goals for different parts of your email course, but in general, most email courses will have a goal of building up to a sale.
Since email courses include multiple emails, they often have multiple goals. For example, an email course I’m planning for my Author Marketing Club has two goals listed in the planning document:
- Increase subscribe rate by 30%
- Convince 20% of new subscribers to buy one of my workbooks for authors
These goals will guide both the overarching course plan and the content of individual emails.
2. Choose a goal for your students
The student goal of an email course is the thing they sign up to learn or achieve. To effectively attract subscribers, a student goal needs to meet four criteria:
- Offer a clear benefit. This is what the student will gain. This can be a specific type of knowledge, access to new systems or tools, a completed project, or anything else you can imagine. The key is to make sure that the benefit is something your audience is actually looking for. You can figure this out by looking at your most popular articles, products, and campaigns, and by developing customer personas.
- Be possible for most people to accomplish. Asking your students to stretch themselves is great, but you don’t want people to be so overwhelmed by the idea of the goal that they talk themselves out of signing up.
- Be achievable in a small period of time. Students will feel more satisfied with your email course, and therefore with your brand, if they can see tangible results within a couple of weeks.
- Be relevant to your brand. Your email course should be a logical lead-in to your ongoing newsletter content and a natural accompaniment to your products/services.
Another thing you want to consider as you brainstorm student goals is whether you want students to learn something, do something, or a combination of the two. I always like to design email courses (and all of my educational resources) with the goal of helping someone create something, but you may find it more effective to focus purely on sharing knowledge.
To see how this works, let’s take a look at some examples. We’ll start with one we’ve already looked at: the MailPoet email marketing course. A large portion of the MailPoet audience is either completely new to email marketing or taking email marketing seriously for the first time. These are also the people most likely to give up on MailPoet early. To keep these people engaged with MailPoet, the email course aims to teach the students the basics of both MailPoet itself and email marketing. Thus, the student goal is “to learn enough about email marketing with MailPoet to start growing my list”.
In a similar vein, Patch understands that people aren’t going to buy a second plant if they kill the first one. Because of this, the student goal of Patch’s email course is “to learn how to care for my new houseplant”.
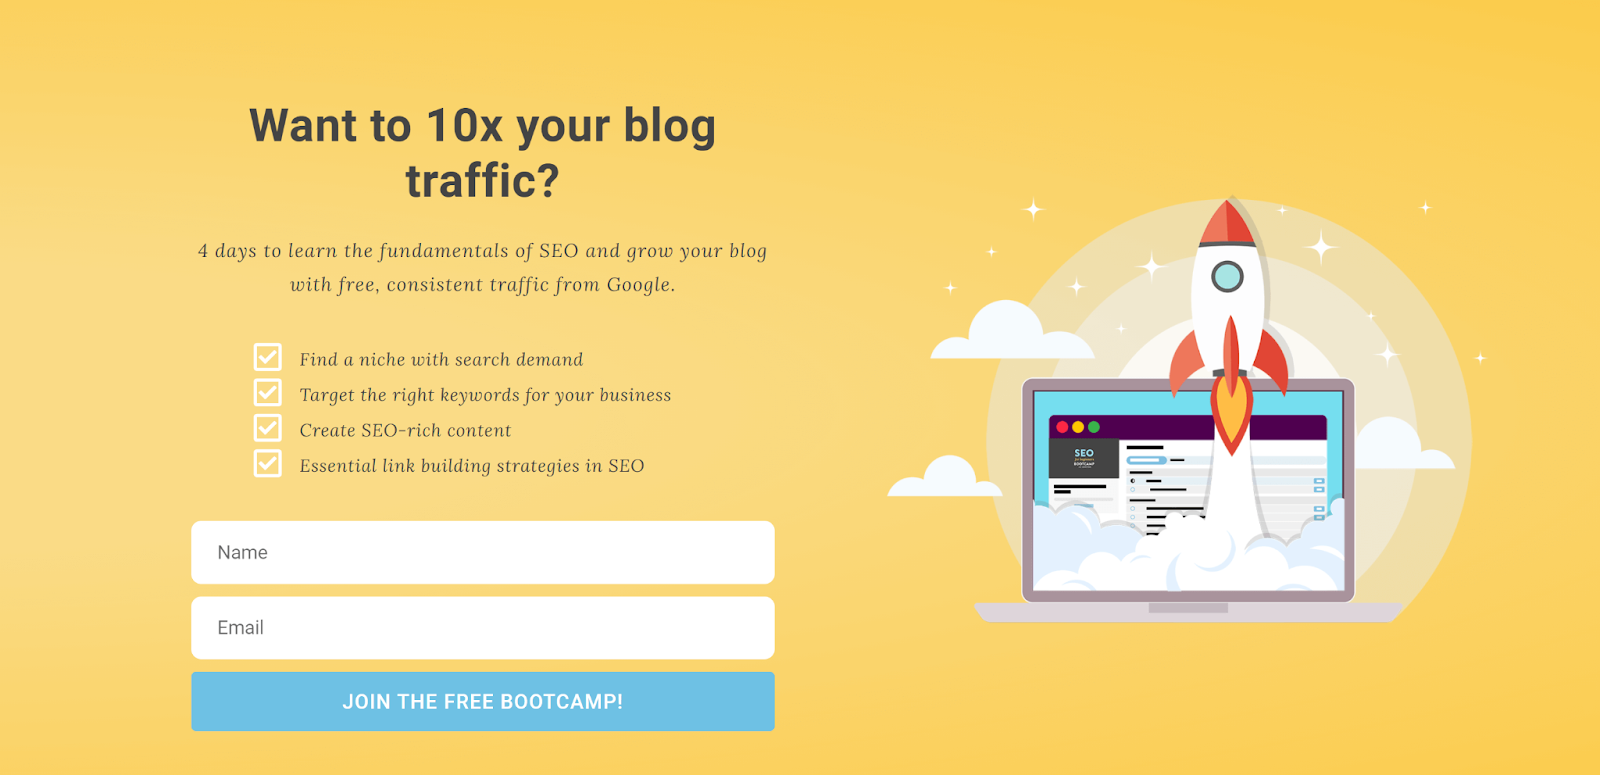
Another example of a successful student goal is SEO expert Leanne Wong’s promise to help students achieve 10x their current blog traffic.
3. Create a lesson plan
Your lesson plan is the structural outline for your email course. This can be created by working backwards from your student goal.
To see how this works, let’s take a closer look at the MailPoet email course. We’ve established that the student goal is “to learn enough about email marketing with MailPoet to start growing my list”.
Now, there are many factors in successful email marketing, but that’s what our long-term newsletter is for. At the beginning, there are a few key things MailPoet users need to know:
- How to set up an email list and signup form
- How to understand email analytics
- Basic strategies for gaining new subscribers
- How to consistently produce high-quality content
The four emails in the MailPoet course are geared towards helping students achieve each of these goals. However, each of these is a large topic, so the emails visually break them down into sections.
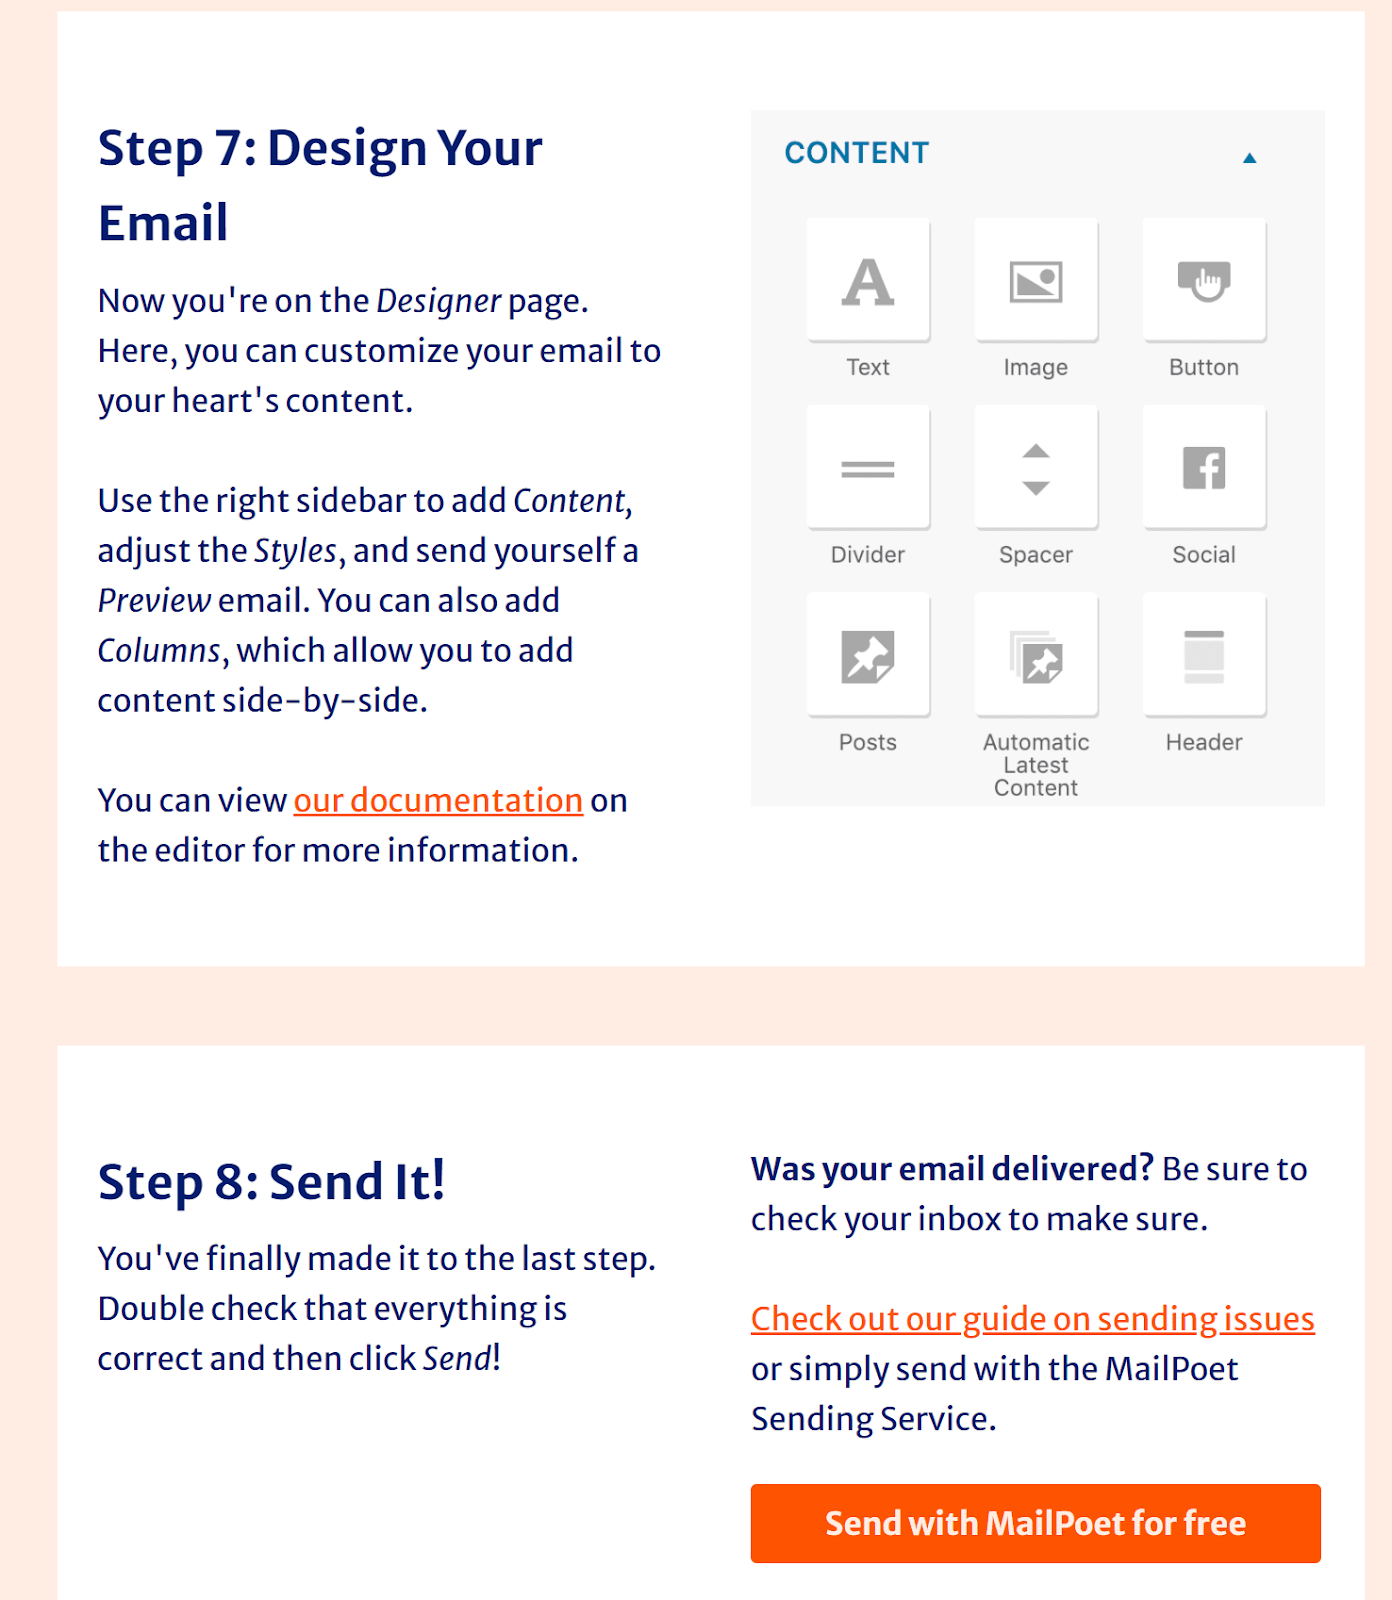
MailPoet also includes numerous links to further resources, especially in the final email:
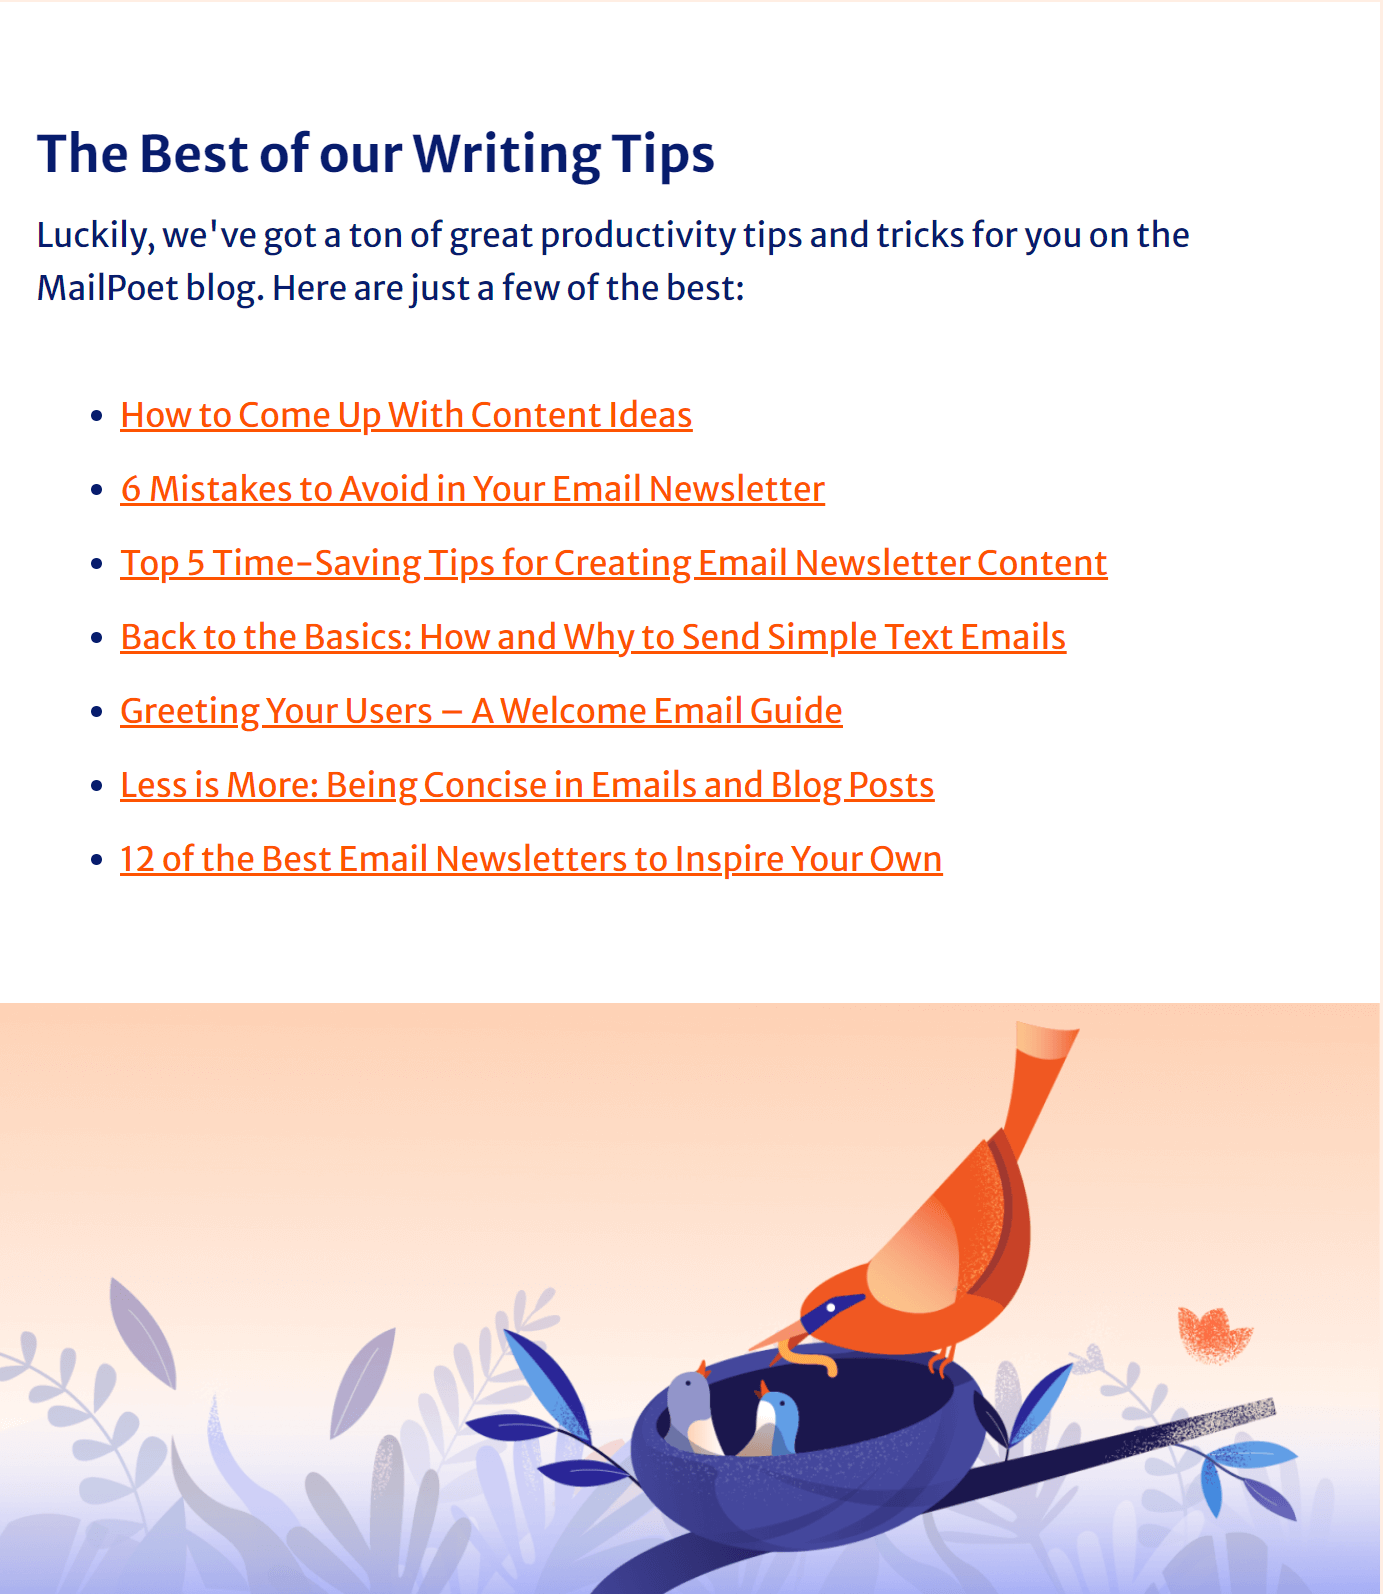
This is a great way to control the length of the email while also making sure that our users can easily access more resources if they want them.
Length
One of the most important things to consider as you plan your email course is length. Specifically, you want to achieve the student goal in the smallest number of emails possible. This is both to save time during the course creation process and to make sure you’re not overwhelming people.
To figure out the right number, create a list of the essential topics people need to understand/activities people need to complete in order to achieve the student goal. Stick to the top-level subjects; you can divide emails into sections with visual elements.
Pro tip: You can also use these topics, and their subsections, to guide your blog content.
Lesson structure
The other thing you want to think about when building your lesson plan is the structure of each lesson. For example, if we’re looking at the MailPoet emails, there’s a clear, consistent structure:
- The first section is an overview of what students will find in the lesson
- The lesson is divided into subsections with visual blocks
- Each block contains a link to further resources
- Each lesson ends with a blurb asking people to share this course if they found it helpful
The length of the emails varies widely, with the first one being the longest, but they all follow this structure.
Establishing a lesson structure early on can simplify the drafting process and allow you to use one email template for all of the lessons in your email course.
4. Email frequency
The final thing to consider in your planning is how often you’ll send your emails. There are a few factors to consider here:
- Lesson intensity. If your lessons are short and simple, sending one out on a daily basis is probably ideal. On the other hand, if your lessons trend long or deal with complex subjects, you might want to consider alternating days or even releasing lessons on a weekly basis. This gives your students time to absorb the material and take any recommended action.
- Other welcome emails. If you already have an automated welcome sequence, you have two options: you can replace it with the course, or you can schedule course emails to go out on different days to avoid overwhelming subscribers.
- Your regular email workflow. Subscribers to your list will also be receiving your regular marketing emails and newsletters. It’s important to factor this in when choosing between a daily and weekly format.
As always, the key is to focus on providing value without overwhelming the subscriber.
How to create an email course
1. Write your lessons
Once you’ve figured out the structure of your email course, you’re ready to start writing the lessons themselves. The exact process for this will vary based on the structure and goals of your course, but there are some best practices to keep in mind as you work:
- Stick to the essentials. People expect email courses to be longer than the average marketing email, but that doesn’t mean they want to spend an hour on a single email. Be respectful of their time.
- Link to further resources. Sticking to the essentials inevitably means leaving a lot of things out. Include links to more detailed resources throughout your lessons. Ideally, these links should be on your site, reinforcing your expertise and encouraging subscribers to interact with your brand more.
- Use language suited to your audience. The average person in the US has an eighth grade reading level. For most ecommerce businesses, this means that you want to use simple language and sentence structure. On the other hand, if your audience tends to have a higher level of education, or if they use specialized language to discuss your industry, you might use more complicated language.
- Use short paragraphs. Shorter paragraphs are easier to read on screens because they leave lots of white space. This is particularly true on smartphone screens, which are significantly smaller than the average tablet or laptop monitor.
- Include a call to action in every email. This is a phrase, image, or link that asks your subscribers to take action. For example, you might ask subscribers to share your email course on social media if they’ve enjoyed it so far. You can also ask them to take action based on what they’ve learned.
Last but certainly not least, remember to edit your work. This email course is an opt-in bonus that will ideally be seen by thousands of people. You want to make sure you’re putting your best foot forward and, more importantly, actually helping them learn. If you’re not sure you’ve accomplished this, ask a trusted colleague or employee for feedback.
2. Design your template
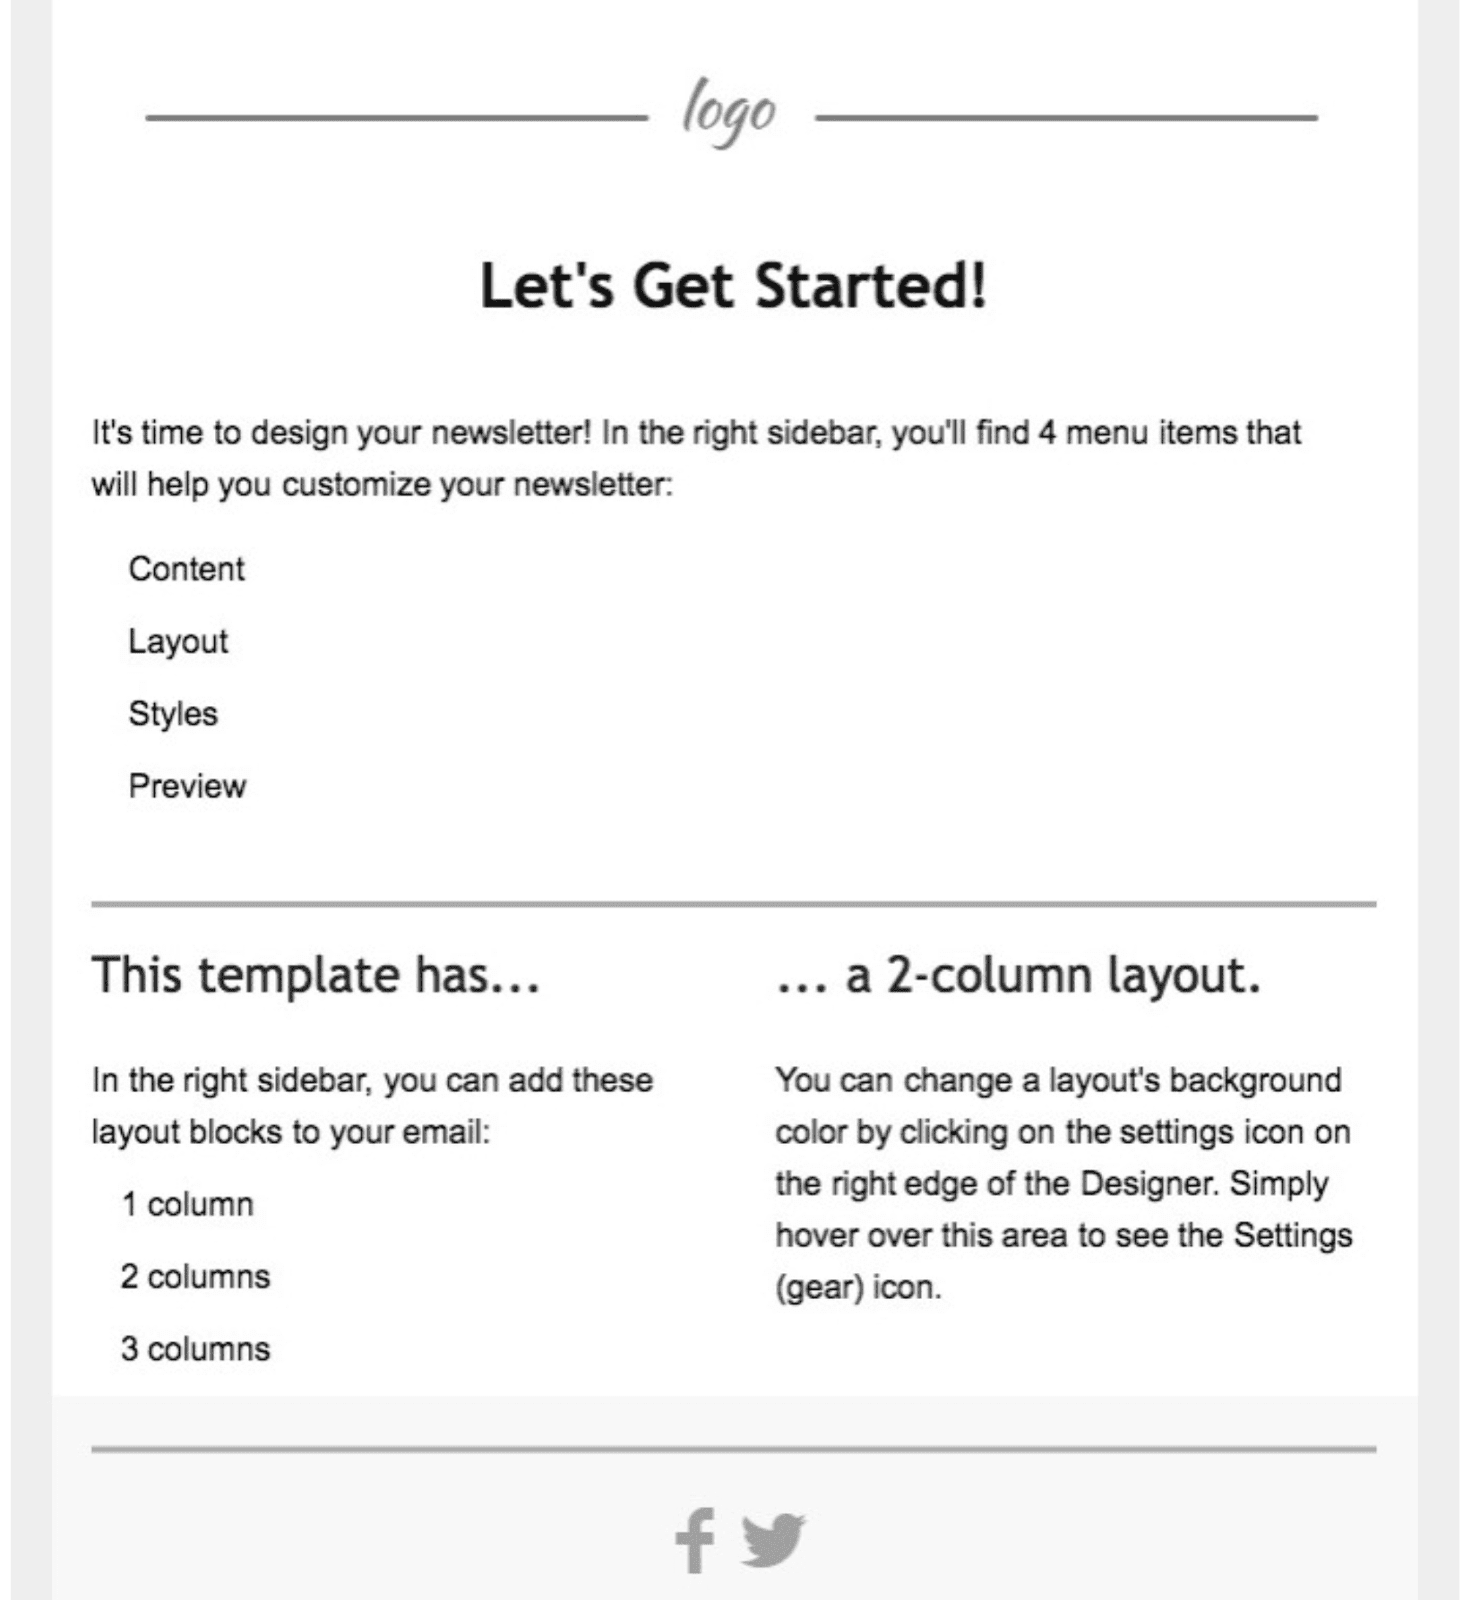
As I mentioned in the last section, sticking with a similar structure for all of your lessons makes it possible to use one template for the entire course. The main way to do this is by customizing one of the existing MailPoet templates.
Selecting one of these templates will open the MailPoet editor, allowing you to customize elements of the email. You can add branded elements, import your content, and schedule your email.
Some MailPoet templates feature minimal design, allowing you to quickly remake them to fit your needs.
Keep some best practices in mind as you build your email course template:
- Use your brand colors. This helps ensure that your audience experiences your email as part of your brand, building their mental relationship with your company.
- Leave lots of white space. White space makes content easier to read on screens, especially the smaller screens of most smart phones.
- Organize text into sections with visual cues. Tools like separators, headers, and images can be used to divide long emails into shorter sections. This allows subscribers to skim or even skip the sections they’re not interested in, focusing instead on the things they want to learn.
- Add shareable links. Specifically, at the end of each lesson, include links that people can use to share your email course on social media or via email. You can create these quickly with the free Website Planet Share Link Generator, then attach these links to buttons for popular social media networks. The MailPoet editor offers a variety of button styles for Facebook and Twitter.
Most of all, focus on making the email easy to read. If you’re unsure about elements of the template, have a colleague or trusted employee provide feedback.
3. Automate your course
With your template ready to go, the final step in how to create an email course is to automate it. Most email marketing services allow for some level of automation, but the process and details vary widely from one tool to the next.
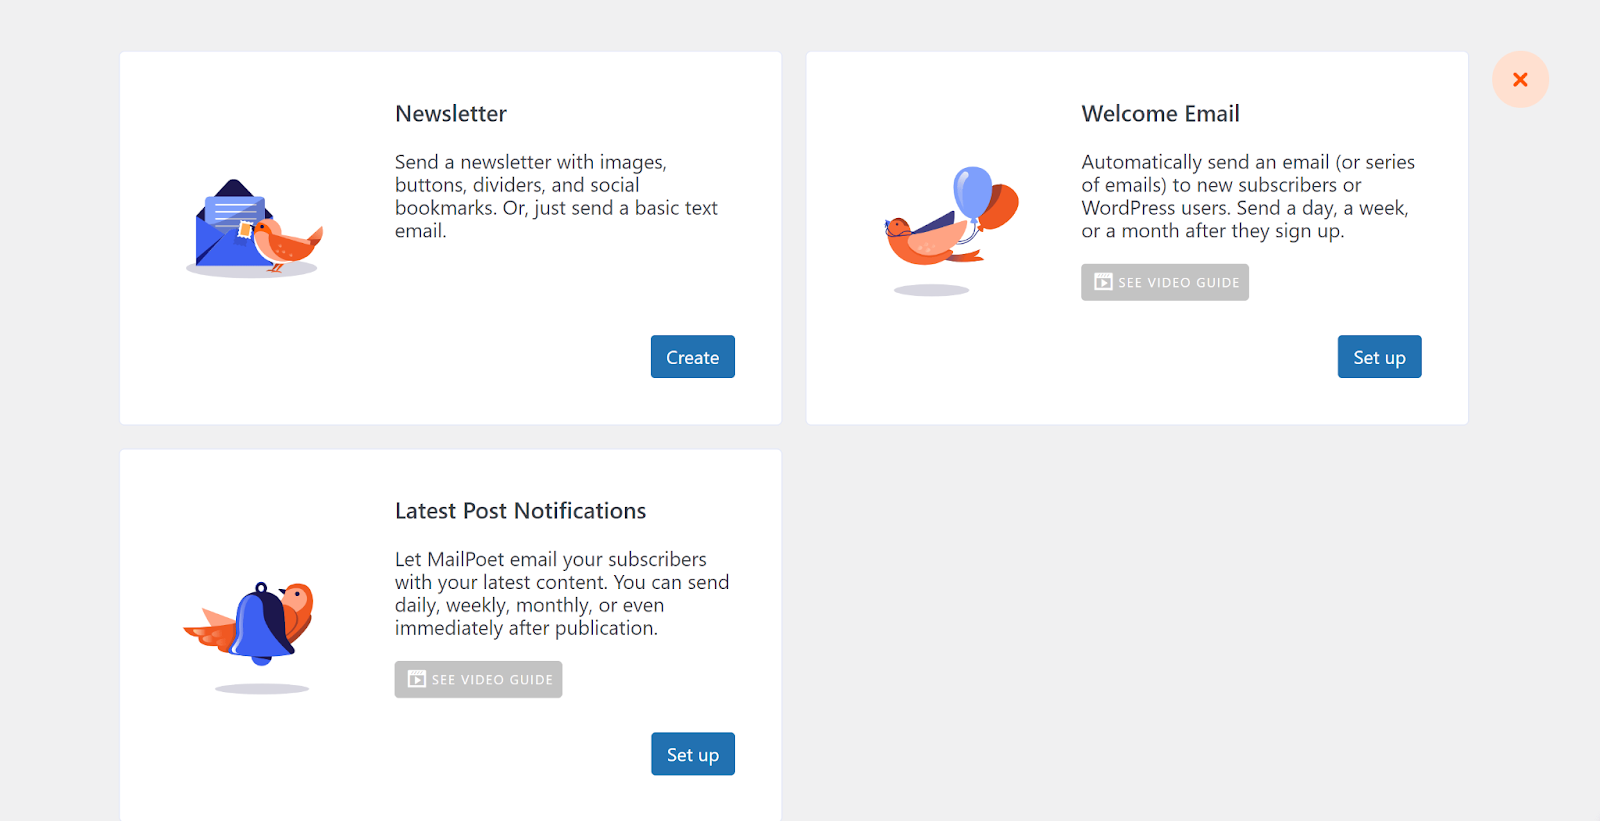
To set your course up in MailPoet, you’ll need to automate each email individually. You can do this by going to the “Emails” section of MailPoet, and choosing one of the automation options. For example, you might choose to send an email course on how to use a specific product after someone buys that item from your WooCommerce store. However, in most instances, email courses are opt-in bonuses, so you’ll want to choose the “Welcome Email” option.
You’ll then be prompted to set up when this email will go out in relation to someone signing up and what list the email will be sent to.

You’ll then be directed to the MailPoet template library, where you can select the template you designed in the previous step. From there, you can plug the content you’ve drafted for one lesson into the template, confirm the information, and schedule your email.
Use your pre-designed template to create the remaining email lessons, and then schedule them at regular intervals.
How to leverage your email course
We’ve already covered a lot so I won’t spend too much time on this, but an email course is like any other opt-in bonus. You need to make sure people know about it for it to work. You can do this in a few ways:
- Mention it in your signup forms
- Create a landing page to discuss the benefits of your course
- Schedule promotional posts about it on social media
- Include a blurb about it, along with a signup form, at the end of all of your blog posts
- Include a link to it in your professional bio
- Talk about it when you do interviews or other guest appearances
In short, be sure to include it in all of your marketing. After all, creating an email course is a lot of work; you want to make the most of it.
Final advice on how to create an email course
An email course is one of the best ways to attract subscribers, establish your expertise, and strengthen relationships with your audience.
If you’re feeling overwhelmed by all of the information on how to create an email course in this video, here are a few simple things you can do to get started:
- Choose your internal goal, such as a specific increase in subscribers or conversions
- Brainstorm potential student goals
- Get feedback from your audience about what they’re interested in learning
- Use the feedback to select a student goal
From there, you’ll be able to start building your first email course!


I’m so glad to hear that I can do an email course with MailPoet! However, I’m a bit confused. Once you create your first lesson and set it up with the Welcome Email feature, how do you attach other email lessons, and how do you set up when those emails are sent in relation to the first email?
Hi Emjay,
Great question – So you would just repeat the process for each “lesson”, adjusting the send time to space each email apart.
For example, you might set up the first lesson to be sent “1 week after sign up”. To add the second lesson to be sent a week after the first, you’d create your lesson two email, and set the send date to “2 weeks after sign up”.
Hope that helps!
Also, this is perfect info for a free email course, but is there a way I can set up a purchasable email course using MailPoet? I’ve read about using Stripe or services like Stripe for a paid email course, but how might I integrate that with MailPoet?
Hi Emjay! You can indeed – take a look at this blog post: https://www.mailpoet.com/blog/paid-newsletter-subscription-service-wordpress/
You’d follow the same process and principles to create a paid email course :)