
Writing blog posts is easy. But writing amazing blog posts? It takes a lot more time and effort to do well.
Anyone can string a sentence together but it doesn’t necessarily mean that sentence will be any good or even make sense! In this guide, I’ll outline a few strategies you can follow to help you slow down your writing. Taking a few minutes to plan your posts and organize your thinking will ultimately make you a better and more effective writer.
Use this checklist every time you write a post and you’ll create healthy habits that make your a better blogger! You can download, print and hang a 1-page version of this guide:
1. Know who you’re writing for

This is probably the most important point in this whole list and shouldn’t be overlooked.
Knowing who you’re writing for will give you an idea of their needs, interests, and wants. It will also give you an idea of the knowledge level of your audience, so you can write a post that’s best suited to their understanding of the topic at hand.
Action: Write down the following key pieces of info for your intended audience:
- How much do they already know about the topic?
- What’s the goal of your post? To educate, inspire, or motivate? Or something else?
- What’s the #1 problem they’re facing that your post can address?
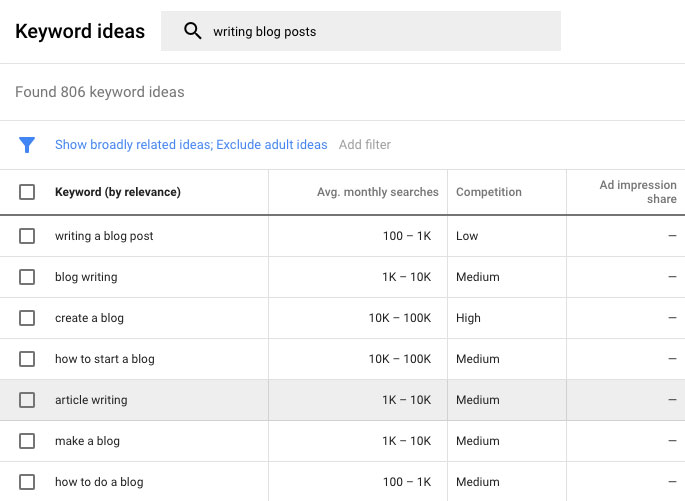
2. Do some keyword research

Doing some basic keyword research can help you understand what your readers are looking for in Google, and how your post might fit into their search.
Tools like Google Keyword Planner and SEO Book’s keyword suggestion tool can give you a quick idea of which words people are searching for when thinking about your topic.
Action: Using the above tools, choose a keyword phrase for your post that has at least 1k-10k monthly searches in Keyword Planner.
3. Research the crap out of your topic

Before you start writing a single word, do your research. Don’t try to bullshit your way through it without doing anything. It doesn’t matter how much you think you know about a topic, there’s always someone out there who knows more or someone who knows something about your topic that you don’t already know.
There’s nothing worse than a poorly-researched post that contains information readers can find elsewhere. If they think your post is “thin,” readers will simply close the tab and return to their search results.
I really can’t emphasize this enough: spend an hour or more on research. Don’t think of research as a waste of time—it’s a hugely important component of writing.
Action: Google your topic incognito and open every link that comes up in the first two pages of results. Read through every link and save any URLs you think are useful (you might want to reference information from these links in your post). Make note as you go of any interesting information, facts, or ideas you might want to research further for your post.
4. Create a basic outline for your post

Don’t overthink your outline, just make a start. Using the information you’ve collected so far, draft a basic outline for your post.
It should include: your theme, one main topic, and some subtopics that will help your reader understand your main topic.
For example, here’s a basic outline I might create for the main topic “email opt-ins”:
- Theme: Email opt-ins
- Main topic: ultimate guide to email opt-ins
- Subtopics: what are email opt-ins; why use an opt-in; different types of email opt-ins; where to find email opt-in plugins.
Don’t forget everything you’ve written down earlier for this checklist—it will help you work out what subtopics to include (i.e. if your readers are mostly beginners, the subtopics would be different compared to advanced users).
Blog posts should always have an introduction and conclusion. These sections are crucial in helping introduce what you’re writing about, and also wrapping up the topic for readers.
Often posts for beginners will need some kind of “explainer” section that provides some background about the main topic. For example, a post about email opt-ins should include a section after the introduction that explains what email opt-ins are.
Action: Create your outline.
5. Come up with a working title
Giving your post a simple, working title will help put you in the zone for writing.
Don’t overthink your title, just use something basic; write down the first title that comes to mind. You can come back and change your title later.
Action: Write down your working title
6. Hook your reader in the first two lines

Introductions should grab the reader and get thinking think, “Yes! This is SO me!” or “I totally agree!” or even “What? Really? I want to know more…”
Basically, you want to hook in your reader with your introduction so they keep reading.
Introductions don’t need to be overly complicated or clever. Here’s one method I suggest following if you get stuck:
- Paragraph 1: What is the most interesting thing that people need to know about your topic?
- Paragraph 2: A sentence or two further explaining what you just said and putting it into context.
- Paragraph 3: Clearly set out what the reader can expect to read in the rest of the post
When you put it all together:
Despite the fact 70% of Americans say irrelevant pop-ups are annoying, they are incredibly effective. In fact, Visual Web Optimizer boosted its sign-ups by 50% when it switched from a call-to-action button on its homepage to having a pop-up.
Pop-ups, when done poorly, are annoying. They can interfere with the user experience and leave a bad taste in a visitor’s mouth. But when presented in a helpful way, they have been proven to work time and time again.
In this post, we’ll explore WordPress opt-ins, what they are, why they’re so effective, the different types, and tools to help you implement one on your site.
Action: Write your introduction.
7. Write your post

Writing a post is easier said than done. Here’s my process:
1. I usually put together a skeleton structure that looks something like this:
- Intro
- What is an email opt-in?
- Types of email opt-ins
- Why use an email opt-in?
- Where to find email opt-in plugins
- Conclusion
2. Next, I flesh it out a bit more with the main points I want to include in each section:
- Intro
- Include a couple of stats about opt-ins
- What is an email opt-in?
- Explain what they are
- Some history about email opt-ins
- They get a lot of flak – explain why people hate them
- Explain their effectiveness – include stats
- Types of email opt-ins
- Welcome mat
- Overlay modal
- Top banner
- Slide-in box
- Why use an email opt-in?
- Collect emails and build list
- Showcase next products
- Highlight important information for visitors
- Where to find email opt-in plugins
- OptinMonster
- Bloom
- Etc
- Conclusion
- What are main points of the post
- Ask reader if they use opt-ins and to leave a comment below
3. Then I just need to fill in the gaps. I usually start by writing the intro and then moving through each section and adding in quick bullet points outlining what I want to talk about. Then I go back through and write the bullet point into proper sentences.
I’d really encourage you to follow my bullet point method. If you are rushing through posts, writing bullet points first will allow you to get your ideas out quickly, and then you can come back and write your sentences down properly, more slowly.
Don’t forget to include keywords in your H2s i.e. for this post I want to include “email opt-ins.”
Action: Write your post.
8. Add images and links

Use images in your post to break up the text, but also illustrate any important information. Elements like graphs and quotes can really catch the eye and draw a reader into the post when they’re scrolling down the page.
If you use any stats, numbers, or research in your post, always include a link. When you don’t include links, it looks like you’re making up stats. Attributing your information will give your post more legitimacy.
This guide to visual communication will give you ideas on what types of images to include from infographics to diagrams to graphs.
The web has some pretty good libraries of stock images today if you don’t have a picture to illustrate your articles. We have a blog post entirely on the topic of finding the right image for your post.
Action: Add images and links.

9. Optimize for SEO

Search your post for your keyword phrase to check how many times you used it. If you haven’t reached 1-2% density, go back through your post and add more in.
Don’t go overboard. Keyword stuffing won’t help your SEO. Instead, make sure your keyword phrase is sprinkled naturally throughout your post.
Action: Search for your keyword phrases and if you haven’t reached 1-2% density, add a few more references throughout your post.
10. Rewrite your title

No matter how good your content is, if your headline sucks, no one’s going to read it. It’s important to spend time coming up with an amazing headline that pulls the reader in so they’ll read your introduction.
For tips on how to write a great headline, check out my post on Medium about quality writing and scroll down to the “5. Write a better headline.”
Our friends at IsItWP have also released a free headline analyzer tool which can help you come up with a title that drives traffic and ranks higher in search results. Nifty!
Action: Choose a type of headline for your post and then write down five possible titles for your post. Choose the one you feel will resonate with your target audience the most.
Wrapping up
And there you have it, a 10-point checklist for writing blog posts.
Writing doesn’t have to be a stressful exercise. Completing each of the action items every time you write a post will provide a process for your writing, but also help you get into the habit of slowing down and planning your thoughts and ideas before diving into writing. Because when your thoughts are organized, it will be easier for readers to understand what the heck you’re going on about!
If you have any questions about blog post writing, let me know in the comments below!


